Description
Note This tutorial has been updated 2014-08-28 to support Meteor 0.9.
We will build a small chat application based on Meteor. It will support anonymous users and users signed in using their GitHub account.
The full example code can be found at https://github.com/sebdah/meteor-chat-tutorial.
The tutorial will cover the basics of:
- Meteor
- Meteor Accounts (user management system)
- Handlebars usage, as that is the default templating system
Before we begin, please open a tab with the Metor Docs. It’s a fairly good companion throughout the tutorial.
Install basic requirements
Install Meteor
First off, install Meteor itself by entering the following in your terminal.
curl https://install.meteor.com | /bin/shIt will download and install Meteor for you.
Building the application
Alright, now that you have the basic components installed, let’s get started with the actual development.
Project structure
Let’s create the project
meteor create chatappThis command will create a basic Meteor project structure that may suit less complex web apps, but it tend get messy as the projects are growing. The default structure (which you have in your chatapp folder) looks like this:
chatapp.css
chatapp.html
chatapp.js
smart.json
The problem is that code for both the client and server lives is within one .js file with an if clause to separate code from the client and server:
// Shared code goes here

if (Meteor.isClient) {
  // Client code
}

if (Meteor.isServer) {
  // Server code
}
But Meteor offers an alternative project structure that we will use in this example. So, before we begin let’s remove some of the example code generated by the create command.
cd chatapp
rm chatapp.*
Now create two folders instead:
mkdir client serverYour chatapp folder should now have the following folders and files:
client/
server/
smart.json
As you might have guessed, all code that lives within the client directory will be available for the client (i.e. the browser), while all code under server will remain on the server side. It is easier (in my opinion) to structure the code like this when the code base grows.
Writing the HTML template
Here’s the basic HTML template that we will be building on top of. There are a few things to note here. First of all, there’s no doctype or html tags because Meteor will add that for us. Secondly there are some wierd tags like {{> welcome }}. This is all part of the Handlebars templating system. What is says is that
The template with
name="welcome"should be inserted at{{> welcome}}
Store the HTML template in a file called client.html in your client folder.
You can now launch your Meteor app with
cd chatapp
meteor
The point your browser at . You should see something like this:

You can leave Meteor running, it will automatically update whenever you change a file in the application.
Implementing simple chat functions
We’ll start writing the actual code for sending messages and we will use the built-in MongoDB database to store all messages.
Create a file called models.js in the chatapp.
This will define a new MongoDB collection called messages. Now let’s extend our client.html to support messages. Add a new {{> messages}} tag right under {{> welcome}} and add the following snipped at the end of your HTML code.
Here’s some more Handlebars tags that will loop over each message object in a list of messages and print the name and message attributes.
Finally we need to expose the messages list to the messages template. To do that we need to create a new file under client called client.js
So, what we’re doing above is that we register a new helper for the template named messages. The new helper exposes a variable named messages to the template. In this case messages will contain all message documents from MongoDB sorted on the time attribute.
Sending messages (manually)
It’s time to introduce the concept of databases everywhere. In Meteor, the database API is not soley for the backend (server) to use. It’s also exposed to the client using an JavaScript API that simulates MongoDB.
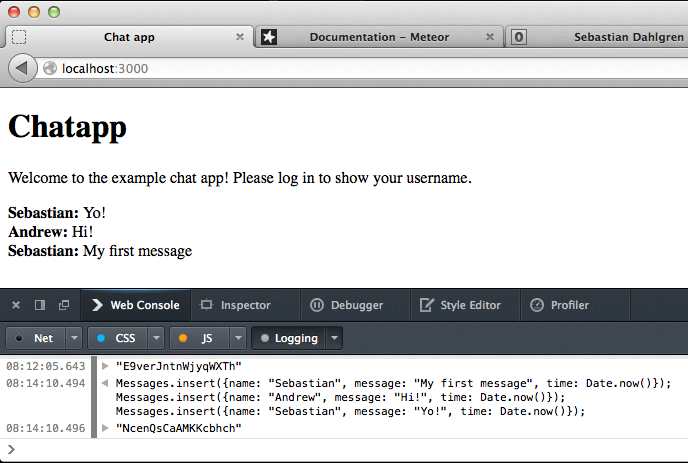
Let’s see what it looks like. Run the following in your browsers JavaScript console:
Messages.insert({name: "Sebastian", message: "My first message", time: Date.now()});
Messages.insert({name: "Andrew", message: "Hi!", time: Date.now()});
Messages.insert({name: "Sebastian", message: "Yo!", time: Date.now()});
You will now see the messages in your chat app.

This works because we exposed the Messages variable in the models.js to both the client and the server. Therefore we have access to the Messages variable in the JavaScript console in the browser.
Security warning: This exposes a security hole as any client will be able to modify the database (and delete messages for example). It’s of course possible to fix. Read more at http://docs.meteor.com/#dataandsecurity.
Sending messages
Now we’ll write a function so that anyone can post messages (without using the JavaScript console :)). Extend your HTML template with a new {{> input}} tag that you place between {{> welcome}} and {{> messages}}. The new looks like this:
We will now need to catch the event and send the message when the user is pressing enter. That’s all done in the client.js. Add the following just undet the Template.messages.messages code:
Template.input.events is the callback for all events triggered withing the input template. In this case we’re listening to keydown input#message which means any time a key is pressed with in the input#message selector. The syntax for the events are event selector.
You can now write messages directly in your app!
Add user authentication
Before we start writing the actual code for user authentication we need to install accounts-ui and accounts-github to support the user management and OAuth signing with GitHub. Run the following in your chatapp folder.
meteor add accounts-ui
meteor add accounts-github
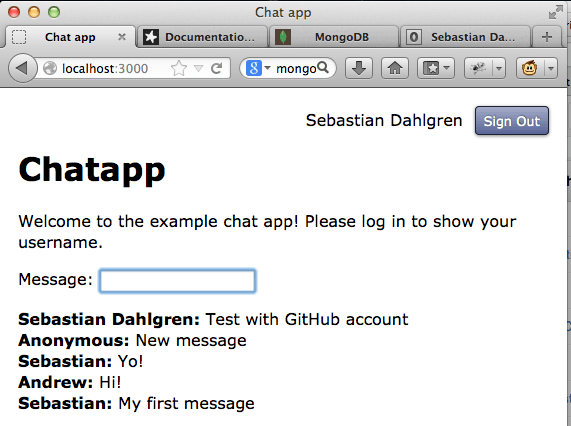
The accounts-ui package is bundled with a UI for us to use right out of the box. Just add {{> loginButtons align="right"}} just above Chatapp
client.html file. Your HTML should now look like this:
Let’s throw some CSS on this app. Create a client.css file under client with the following code:
We should also make sure to store the name of the user is the messages database, currently we have hard coded Anonymous as the name for all users. Update the Template.input.events to look like this:
Meteor.user() will hold profile information about the currenly signed in user. If no user is signed in it will return null. So now we’re storing the user’s full name in the database rather than just Anonymous.
Open your application in a browser. You will see that the GitHub login button is red. This is because you will need to configure the GitHub OAuth the first time you use it. Just click the button and follow the instructions in order to get your Client ID and Client Secret from GitHub.

When this is all done you should be able to login to the chat app using your GitHub credentials.

Test it in two browsers
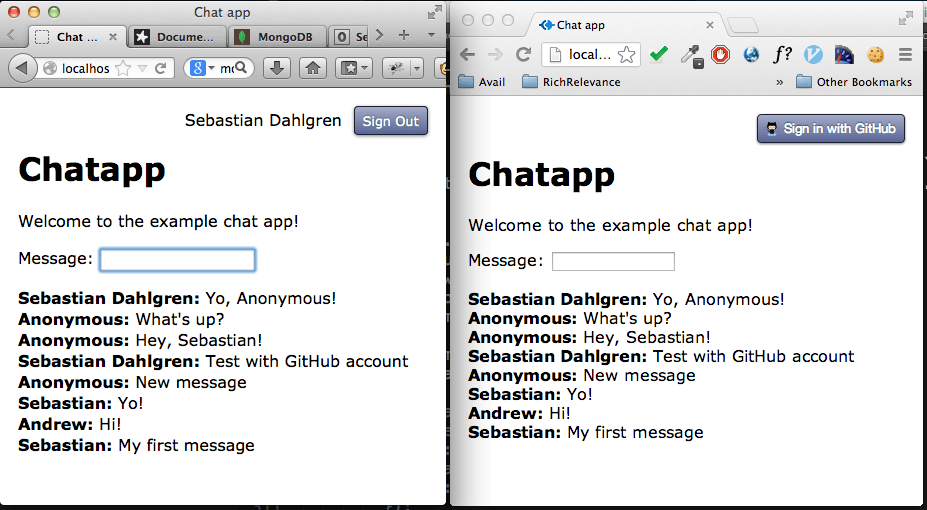
Now, just to test the actual chatting, open another browser and point at as well. Do not log in with this second browser. You should now have two different browsers. One logged in with your GitHub account and one that is not logged in at all.
Then try to write some messages and see that they are popping upp in the other window directly (without having to reload).

Full code
To get the full code please checkout https://github.com/sebdah/meteor-chat-tutorial/tree/master/chatapp.
If you liked this tutorial, star it!
If you liked this tutorial, please star the repo at https://github.com/sebdah/meteor-chat-tutorial. Thanks!

