For those of you hosting your code at GitHub, there is a fantastic project called Travis-CI. It will run continuous integration tests on your open source project for free. I have used it for CI testing of my Python projects. It is really easy to get started, just follow the steps below.
Note that the open source version of Travis-CI does only support public repositories and builds running up to 20 minutes. If you have a private repository you will need to sign up for Travis Pro, which currently is in beta. Check out http://www.travis-ci.com/ for more information.
Sign up for Travis-CI and enable CI tests
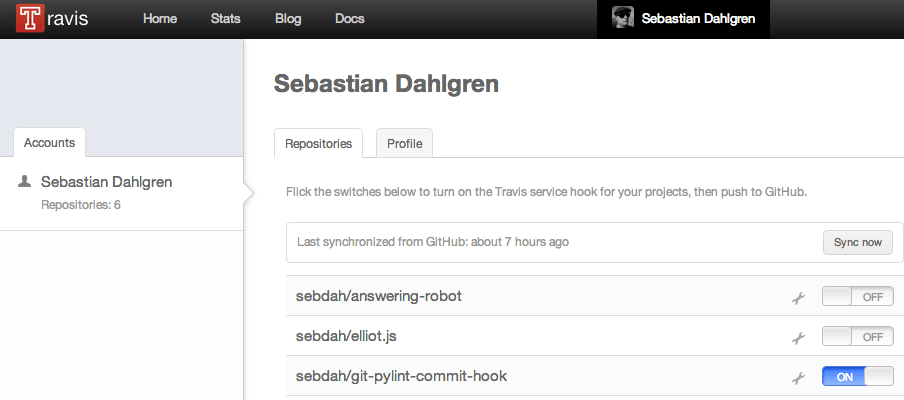
First of all, you must connect Travis-CI to your GitHub profile. Just go to travis-ci.org and sign in with your GitHub account. Travis will then find your public repositories.
You can then flick the on/off switch to your repos to enable Travis-CI.

Configure Travis-CI
Ok, now we need to tell Travis what to test and which Python versions you want to support. Just create a file called .travis.yml in your repo root folder.
.travis.yml
language: python
python:
  - "2.5"
  - "2.6"
  - "2.7"
script: nosetests
What we do here is that we tell Travis that it’s a Python project which supports Python versions 2.5, 2.6 and 2.7. Travis will then make sure that your project runs well with all those Python versions.
The script command is important. You could define your own script to run tests for your project here. For more details on Nose tests, see the Nose documentation.
Handling Python dependencies
If you have any specific Python dependencies, Travis has got you covered. Travis will test your project inside a Virtualenv, so all you need to do is to write a requirements.txt and tell Travis to install it. Add the following to your .travis.yml:
.travis.yml
install: "pip install -r requirements.txt --use-mirrors"
Build only specific branches
Per default Travis will build once you push to a branch on GitHub. That behavior can be annoying if you are commiting often to you development branches. You can restrict which branches Travis is monitoring for changes in the .travis.yml. Either you blacklist branches or whitelist them:
.travis.yml
# Whitelisting example
branches:
  only:
    - master

# Blacklisting example
branches:
  except:
    - develop
    - feature/add-travis-support
Add a nice build status icon to GitHub README
A cool bonus is the build status icon that you can add to your GitHub README file. Just add a line like this to the README:

E.g:

The result is a status image like this:

Summary
This is just a simple Travis-CI setup. You can of course do much more with Travis, just dig into the docs. Happy testing!